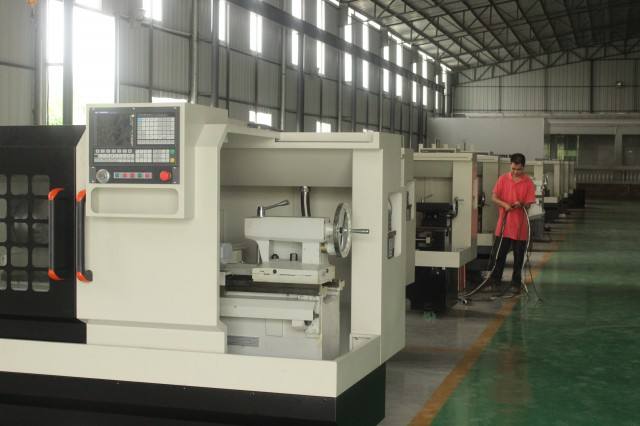
CNC lathe machining is a kind of high-precision, high-efficiency machine tool with digital information control parts and tool displacement. It is an effective way to solve the problems of aerospace products, such as parts variety, small batch, complex shape, high precision and high efficiency and automatic processing.
CNC lathe machining is a high-tech processing method for precision hardware parts. Can process various types of materials, such as 316, 304 stainless steel, carbon steel, alloy steel, alloy aluminum, zinc alloy, titanium alloy, copper, iron, plastic, acrylic, POM, UHWM and other raw materials, can be processed into square, round combination
Complex structural parts.

Contents
hide
1. The composition of CNC machine tools
(1) Mainframe, he is the subject of CNC machine tools, including machine parts, columns, spindles, feed mechanisms and other mechanical components. He is a mechanical part used to complete a variety of cutting operations.
(2) Numerical control device is the core of CNC machine tools, including hardware (printed circuit board, CRT monitor, key box, paper tape reader, etc.) and corresponding software for inputting digitized part programs and completing input information. Storage, data conversion, interpolation operations, and various control functions.
(3) Drive device, which is the drive component of the CNC machine actuator, including the spindle drive unit, feed unit, spindle motor, and feed motor. He realizes the spindle and feed drive by electric or electrohydraulic servo system under the control of the numerical control device. When several feeds are linked, the positioning, straight line, plane curve and space curve can be processed.
(4) Auxiliary devices, necessary components of the index control machine tool to ensure the operation of CNC machine tools such as cooling, chip removal, lubrication, lighting, and monitoring. It includes hydraulic and pneumatic devices, chip evacuation devices, exchange tables, numerical control turrets, and numerically-controlled indexing heads, as well as tools and monitoring devices.
(5) programming and other ancillary equipment, can be used outside the machine for parts programming, storage and so on.
2. The composition and working principle of CNC lathe
CNC lathe is a typical electromechanical integration product. It is a high-efficiency, high-precision, high-flexibility and high-automation modern mechanical processing equipment integrating modern machinery manufacturing technology, automatic control technology, detection technology, and computer information technology. Like other mechatronic products, it is also composed of a mechanical body, a power source, an electronic control unit, a detection sensing portion, and an execution machine (servo system). In the processing of parts on ordinary lathes, the operator continuously changes the relative motion path between the tool and the workpiece according to the requirements of the parts drawing, and the tool cuts the workpiece to produce the desired parts; while the parts are processed on the CNC lathe In this case, the processing sequence, process parameters, and lathe motion requirements of the machined part are written in CNC language, then input to the CNC device, and the CNC device executes a series of processing to the servo system. Instructs the servo system to drive the moving parts of the lathe to automatically complete the machining of the parts.
3 Factors Affecting the Precision of CNC Lathe Machining
The machining precision of CNC lathes consists of the control accuracy of the CNC system and the mechanical precision of the lathe. The precision of the CNC system and whether the servo control method is adjusted to the optimum directly affect the machining accuracy of the CNC lathe, and the machine body accuracy of the machine tool also restricts the machining accuracy of the CNC lathe. In general, the inaccuracy of CNC lathe machining is generally caused by the following reasons: (1) Lathe thermal deformation error;
(2) Lathe geometry error;
(3) Errors caused by turning tool geometry parameters;
(4) Tool wear error;
(5) Servo feed system error, etc.
Among them, the error caused by turning tool geometric parameters and servo feed system error are the most common in actual production. Most modern CNC lathes use servo motors to drive the ball screw to achieve its position control. The transmission error of the ball screw can affect the accuracy of the machine tool and become one of the important factors of the positioning accuracy of the CNC machine tool. At present, the NC process of CNC machine tools in China is mostly controlled by a semi-closed-loop control servo feed system. When working on the CNC lathe, the reverse movement of the screw of the servo motor will cause the air gap to run empty, causing backlash error between the bearing and the bearing seat. At the same time, the external force will cause the machine’s transmission and moving parts to be elastically deformed. The error of the CNC lathe is the sum of the forward running error and the backlash, and the unevenness of the components during the operation leads to the change of the elastic gap, which affects the numerical control equipment. Accuracy.
The machined parts of the mechanical parts are generated by the movement of the turning tool of the numerically controlled lathe on the surface of the parts according to a certain trajectory. Due to the turning radius of the tool nose and the tool declination angle of the turning tool of the CNC lathe, the axial dimension of the machining of the cylindrical component changes, and the variation of the axial dimension is proportional to the radius of the tool tip arc. The amount of change in the axial dimension increases as the radius of the sharp arc increases. The change in the axial dimension is inversely proportional to the angle of the master knife of the lathe tool, and the change in the axial dimension decreases as the master knife angle increases.
Therefore, in the process of programming the machined parts, the axial displacement length should be changed according to the change of the axial dimension. In CNC lathe machining, the parameters such as the radius of the tool tip arc, the lead angle kr, the distance between the tool tip, and the height of the center of the tool will affect the accuracy of the machined part and the surface roughness of the part. The irrationality of relevant parameters will also affect the service life of lathe tools.
4 Methods and Measures to Improve CNC Lathe Processing Accuracy
How to improve the machining accuracy of CNC machine tools, that is to reduce the machining error of machine tools, has become the focus and hot issue of people’s research. For CNC lathes encountered in the production of the actual production of the product processing accuracy is not high, you can take error compensation method, error prevention method and other methods and measures to improve its processing accuracy.
4.1 Error Compensation Method
The error compensation method is a method that uses the compensation function of the CNC system to compensate for the existing error on the lathe axis, thereby improving the accuracy of the lathe. It is a means to improve the accuracy of CNC lathes both economically and economically. Through the error compensation technology, high precision parts can be machined on CNC lathes with low precision. The implementation of error compensation can be done by hardware, but also by software.
(1) For CNC lathes using a semi-closed-loop servo system, the positioning accuracy and repeatability of the lathe are affected by the reverse deviation, which in turn affects the machining accuracy of the machined part. For the error in this case, the compensation method can be used. Reverse bias gives compensation, reducing the precision of the machined part. At present, many CNC lathes in China’s mechanical processing industry have positioning accuracy of more than 0.02 m m. For such lathes, there is generally no compensation function. Programmatic methods can be used to achieve unit positioning in certain situations and clear backlash.
(2) The programming method can realize the interpolation processing of the CNC lathe with the mechanical part unchanged and the low-speed unidirectional positioning reaching the interpolation starting point. When the interpolation feed is reversed in the interpolation process, the backlash value can be formally interpolated to meet the tolerance requirements of the part. Other types of numerical control lathes can be provided with several addresses in the set numerical control device memory, so as to store the backlash value of each axis as a dedicated storage unit. When a certain axis of the lathe is instructed to change the direction of movement, the numerical control device of the numerical control lathe will read the backlash value of the shaft from time to time, and compensates and corrects the coordinate displacement command value, and accurately positions the lathe as required. In the specified position, eliminate or reduce the effect of reverse bias on the part machining accuracy.
4.2 Error Prevention Method
The error prevention method belongs to ex ante prevention, which means trying to eliminate possible sources of error through manufacturing and design approaches. For example, by increasing the precision of machining and assembly of lathe parts, increasing the rigidity of the lathe system (improving the structure and materials of the lathe) and by strictly controlling the machining environment (such as the processing environment and temperature rise of the workshop), it is improved. The traditional method of machining accuracy. The error prevention method adopts “hard technology”, but this method has a disadvantage that the performance of the lathe grows in geometrical relationship with the cost. At the same time, simply using the method of error prevention to improve the machining accuracy of the lathe, and after the accuracy reaches a certain requirement, it will be very difficult to raise it again.
4.3 Other methods
The machining accuracy error caused by the turning tool geometric parameters can be solved in the following way: During the programming process, the trajectory of the tool tip is consistent with the part machining contour and the ideal contour, that is, the actual required arc-shaped tool tip before being programmed through human calculation. The trajectory is converted into a trajectory of the imaginary tool nose, and zero error is theoretically achieved. At the same time, it is also important to use the center of the tool tip arc as the tool position in the programming process. Because the process of drawing the center trajectory of the tool nose arc and the calculation of its feature point are complicated in this process, a slight mistake will cause great The error, in order to avoid and reduce the occurrence of this error, can be done by using the drawing function of the CAD medium distance line and the coordinate query function of the point. However, when using this method, it is necessary to check whether the value of the radius of the tool tip arc used in the tool is consistent with the value in the program, and care should be taken when considering the value of the tool.


